Barcode & RFID walkthrough
This page is a complete introduction to TrackOnline usage with RFID tags or barcodes. You can also find documentation about some points discussed here on their specific section, such as Base data for the unique items or App for the TrackOnline app.
About licenses
The RFID features are only available for PRO+ Enterprise users.
What is it for?
Barcodes and RFID tags identify each of your items, helping you to keep track of them. Each item is what we call a unique item, a list of unique items is available in TrackOnline. The most common usage of unique items is to attach them to transactions so that transporters can scan items when picking them up and delivering them to your customers. It is also possible to bring more automation through RFID portals that scan items when they enter or leave your facilities and automatically create transactions in your administration.
Barcodes & RFID tags
First things first, we need to start by sticking tags or barcodes to the items.
Should I use barcodes or RFID tags?
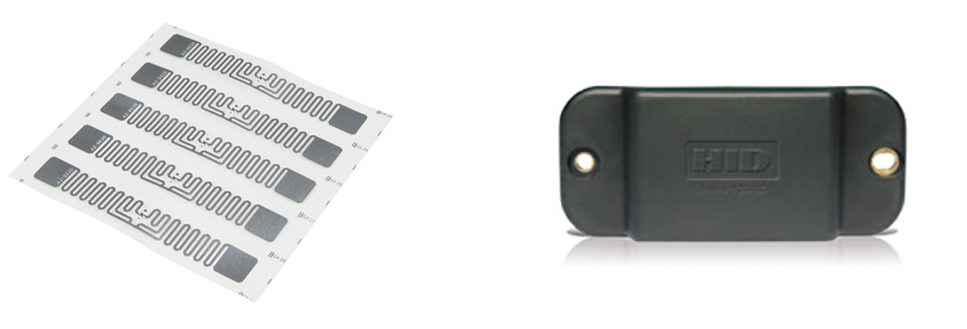
Barcodes are simple paper tags, the same that you can find on products in supermarket, for example. As these are just paper, you can easily print them yourself at very low cost. This is also simpler to set up demos.
On the other hand, RFID tags are metallic printed circuits on tags. You can buy RFID tags from a few cents per tags up to few euros for more durable industrial grade tags. RFID tags are better to use for automation projects as you don't need to aim to it for scanning. Also, we use passive RFID tags, this means that they don't need a power source, so no worries about the battery life.
Below, on the left, a basic RFID label, on the right, an industrial grade tag.
You can use barcodes with your phone's camera or a cheap barcode scanner whereas RFID scanners are a bit more expensive.
Once you have determined the most suitable solution for your project, you can stick the tags to the items you want to track.
Register your items in TrackOnline
When you have put the barcodes or the RFID tags on your items, you can add them to your TrackOnline administration.
First, you need to create an item definition for each item type that you want to add. If you need to add 5 unique pallets and 6 unique crates, then you need to create one pallet item definition and one crate item definition. HERE is more information about how to create item definitions.
The next step involves the app, be sure to download the app on your device, it is available on Google Play for Android devices and Apple App Store for iPhone and iPad. If you use the app on an Android RFID scanner, the process is exactly the same unless it is stated in this documentation.
Now, open the app and log in. From the homescreen, you can tap on Go to unique items. Then, click on the + at the bottom right to register a new unique item.
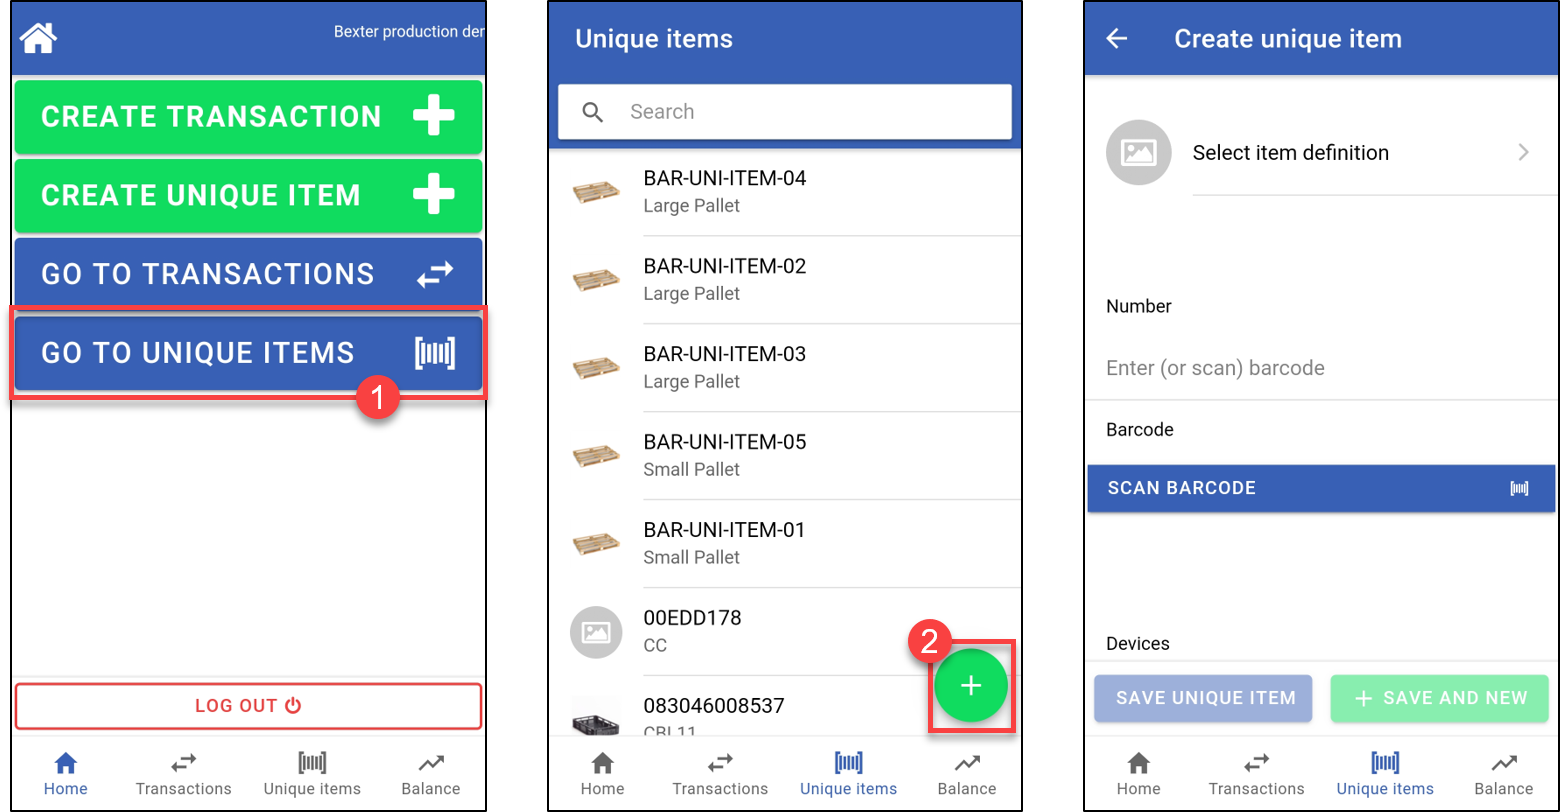
At the top, you need to select the item definition the item corresponds to. Then, if you use a barcode, tap on Scan barcode. This will either open a camera screen or turn on the scanner whether you are on a smartphone or on a barcode scanner. Scan the barcode of your item to continue. If you use RFID tags, tap on Scan RFID (only available on RFID scanners) and the scanner will detect it. Take care to be far enough from other tags as the scanner could detect another tag that the one you want to register.
When this is done, tap on Save unique item to save it or on Save and new to save it and register a new item. You need to repeat this process for each of your items.
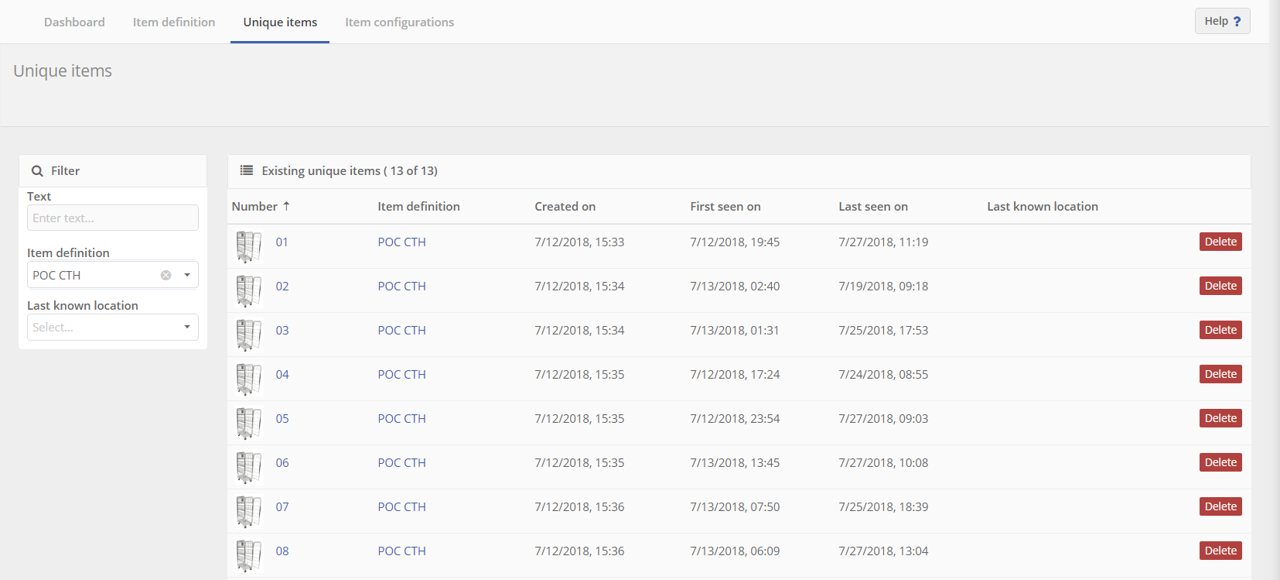
If you log in your TrackOnline administration on a computer, you will be able to see the list of the unique items created under Base data / Items / Unique items. If you click on the number of an item, you can see the details, namely the creation date, the barcode or the RFID tag (EPC code) value and the date it was first and last seen on. However, you cannot edit unique items from the TrackOnline webapp.
Ready to go!
Everything is set up, you can start to use your unique items. Therefor, create transactions as you would do it normally but without adding items. When the shipment is ready, open the transaction in the app and scan the items, as shown below.
Flash
If it is too dark and the camera does not recognize the barcode, you can enable the flashlight by tapping on the  button at the top right corner.
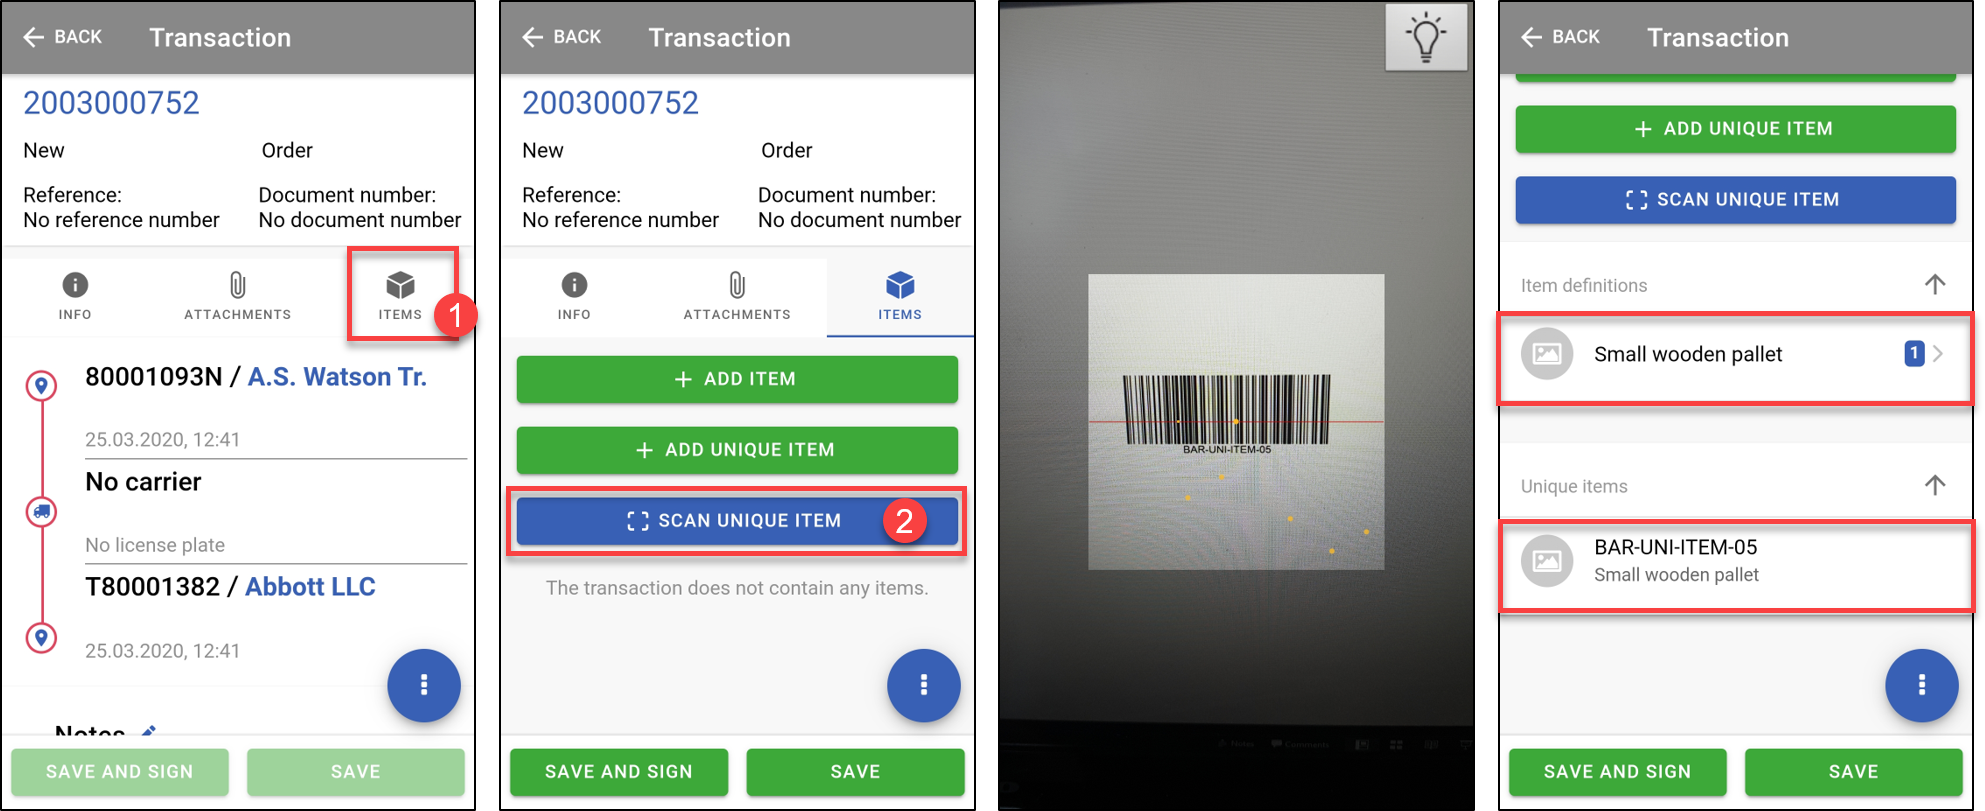
This is for adding an item with a barcode but you can also scan an RFID tag from your RFID scanner by choosing Scan EPC after tapping on Scan unique item.
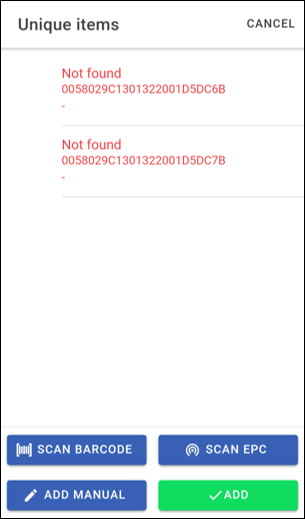
Not found items
If the items scanned with RFID are not registered unique items, they will appear red with the title Not found in the list.
As you can see the item scanned have been attached to the transaction. Here, it is a Small Wooden Pallet with the barcode BAR-UNI-ITEM-05. The transaction is now ready to be processed as you would do it normally.