Balances
View balances and send balance confirmations
Your balance overview gives you information about the different balances at the different locations. To see your balance overview, press 'Balances' at the left side of the screen. See the image below.
Balances
Balances
You arrive at a screen with two sub-headers, 'Balances' and 'Confirmations', as shown in the image below.
Sub-headers balances

Balance overview

At the sub-header 'Balances', you find a balance overview showing the balance of each product with one specific location. You can select the location in the drop-down list in the upper right red frame.
Note:
When a balance is negative, it is shown in orange. See the bottom of the red frame.
Balance overview per location
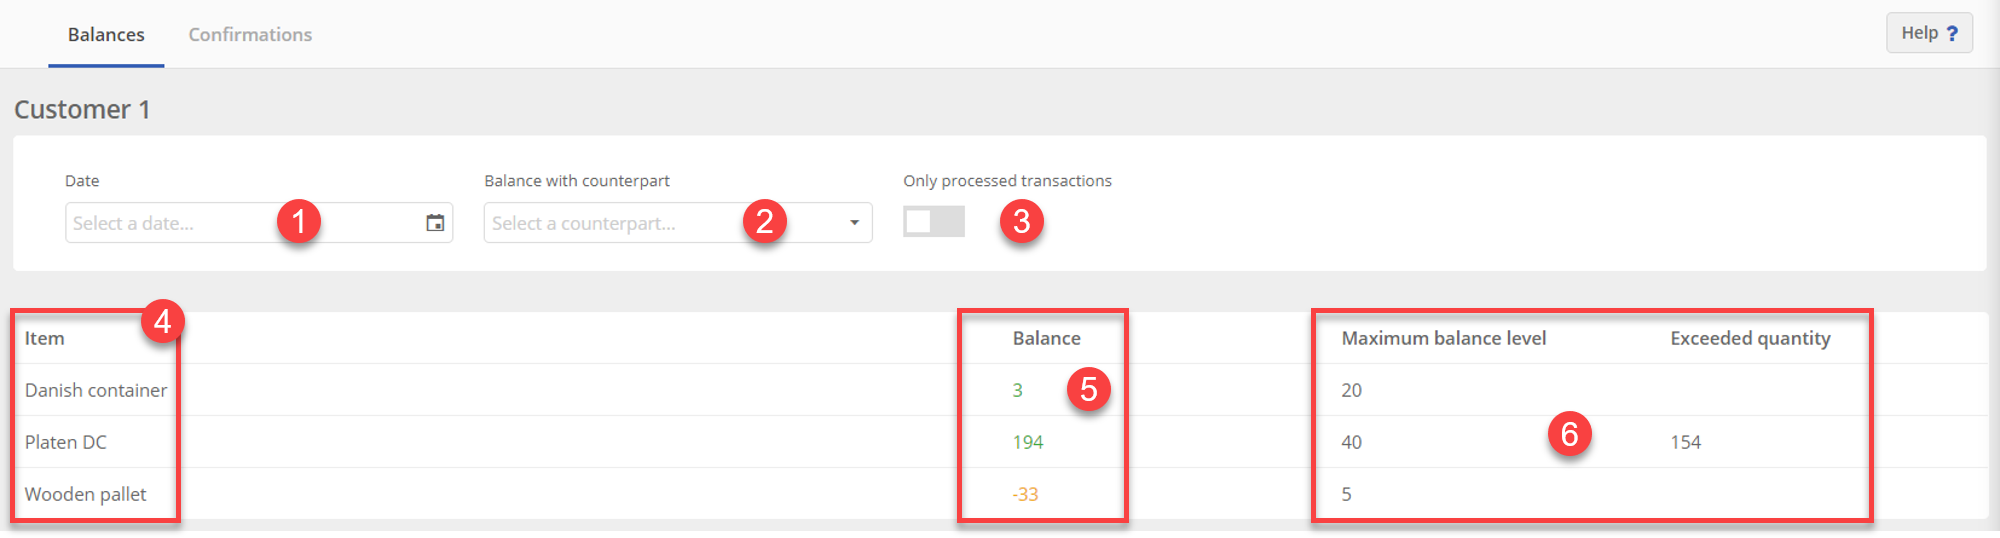
If you click on 'View more >' from the balance overview, you will see the balance of the location you selected. In this case, Customer 1.
- Here you can select the date you want to see the balance at.
- If you select a counterpart, you will see the shared balance with this location. This includes transactions that still have to arrive or to be sent. When you want to remove the selected counterpart, click on the 'x'.
- This button gives you the option to see your balance with only processed transactions. This means all the other transactions regarding this location are not taken into account.
- In this frame you see the different items that are currently at this location.
- Here you can find the balance of the different items at the location. This balance also includes non processed transactions. In order to change that, press the switch button 3, to only show the balance of processed transactions.
- Here you can see the maximum amount that is allowed at this location (if this is registered). If this maximum is exceeded, it will show with how many, at the column 'Exceeded quantity', as shown in the picture below.

Confirmations
In order to view and make balance confirmations, click on the sub-header 'Confirmations', as shown in de image below. Check also our instruction video about 🎥 Balance confirmations.
Sub-header 'Confirmations'

Confirmations overview
You enter a screen that shows you an overview of the existing confirmations per location, see the image below. In the image you see three red frames that mark different options in the overview. Each frame will be explained below the image.
Confirmations overview
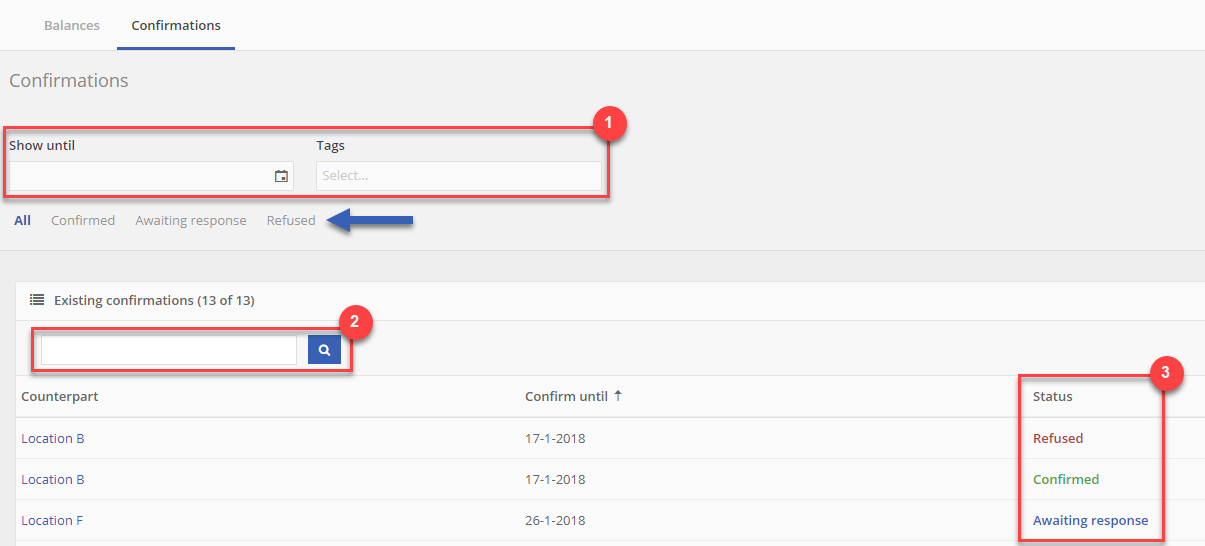
- Frame 1: Here you can filter your confirmations based on date and/or tags.
- Frame 2: Besides filtering on date and/or tags, it is possible to filter your confirmations on counterpart location. Therefor, type the location of choice in the search bar and click on the magnifying glass or press enter.
- Frame 3: This column shows the status of a confirmation. It shows if and how a counterpart has responded.
Besides the status shown in frame 3, you can also click on one of the sub-headers, shown by the blue arrow, to see only the confirmations with that status.
In the confirmation overview, it is also possible to sort the confirmations by column. You can do this by clicking on one of the column titles, see the image below 'Sort on column'. In this example the confirmations are sorted on date, indicated with the small arrow. The confirmations are sorted with the oldest confirmations on top and the newest on the bottom.
Sort on column

Confirmation details
If you want to take a look at the details of a confirmation, click on the location name. In this case we click on 'Location B'. The following screen is shown:
Confirmation details - balance

This example shows an overview of the item balances with location B on 1-1-2018 and on 17-1-2018. If you want to go back to the previous screen, you can click on the 'x' at the top right of the screen.
Note:
If you have clicked on a confirmation with the status 'refused' to see the confirmation details of, you will see a comment line on top of the screen. See the image 'Comment line - refused'. This comment line describes why the confirmation has been refused.
Comment line - refused

If you want to take a further look into the balance, you can click on the sub-header 'Transactions', see the image below. Here you see all the different transactions of this balance.
Confirmation details - transactions
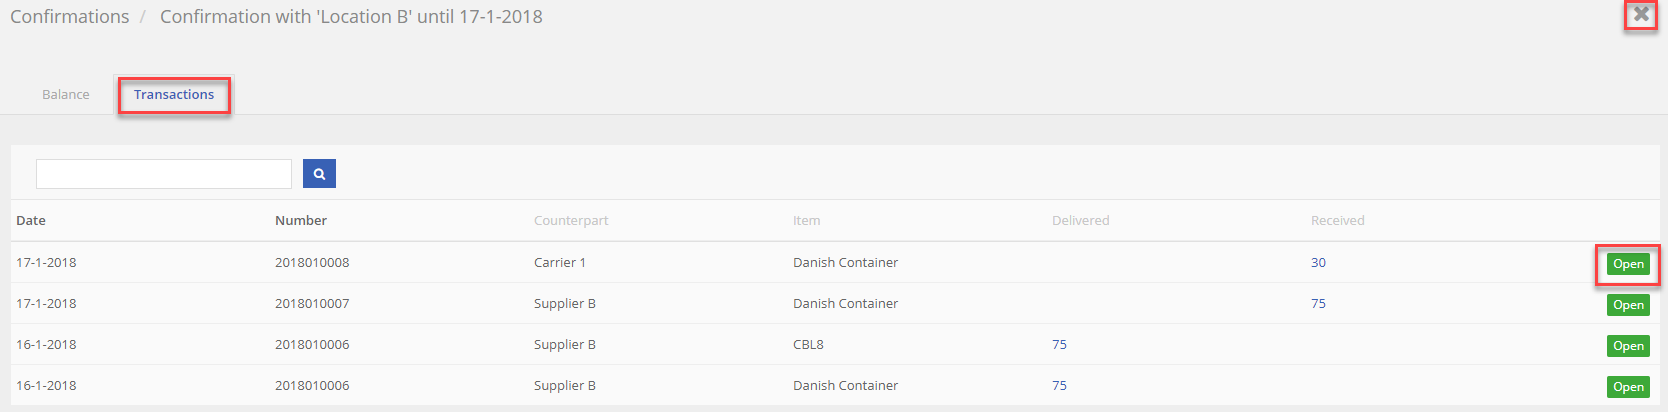
For a further look into one of the transactions, you can click on the green button 'Open' at the right side of the screen. You will see a screen similar to the image below. This screen shows the details of the transaction. It is also possible to download a report with the transaction details. Therefor, click on the button 'Download report', designated with the red arrow.
Transaction details
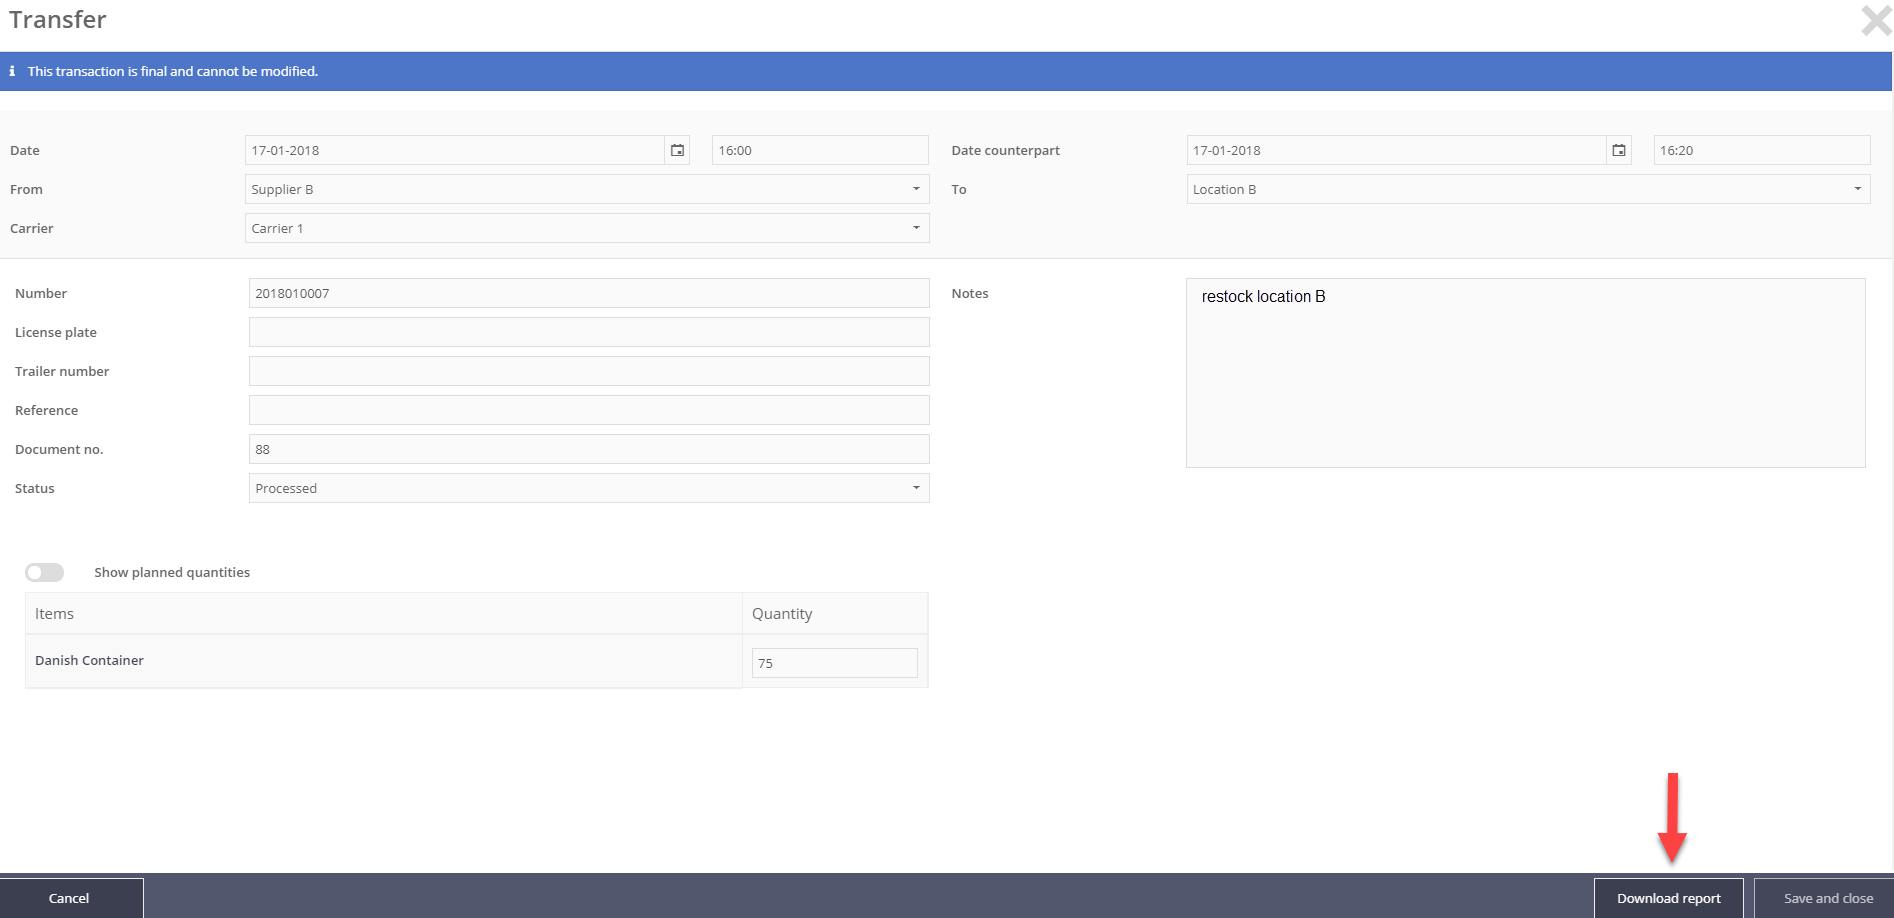
If you want to close the window, click the 'x' at the top right of the screen or click on 'Cancel' at the bottom left of the screen. You will return to the confirmation detail screen.
New confirmation
If you want to make a new confirmation, click on the sub-header 'Confirmation' as shown in image 'Sub-header 'Confirmations'. Next click on the  button at the top right of the screen. You will see the screen similar to the image below.
TIP
For more information about new balance confirmations, you can also take a look at our video: 🎥 TrackOnline instructions: Balance confirmation
New confirmation
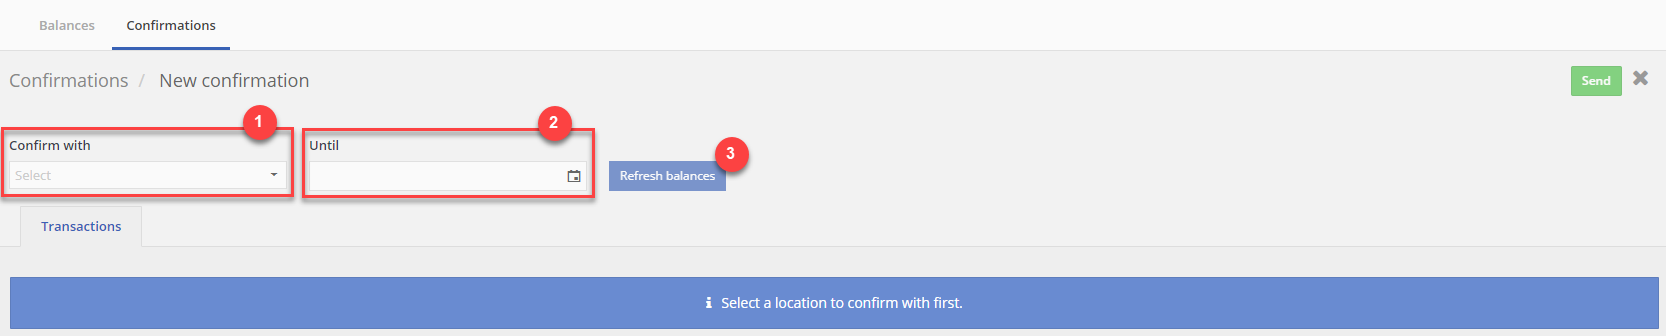
First select the counterpart that you want to confirm with, shown with number 1. Next, select the period as shown with number 2. Then click on the blue button 'Refresh balances'.
Two sub-headers appear, 'Balance' and 'Transactions'. See the image 'New confirmation overview' below.
New confirmation overview
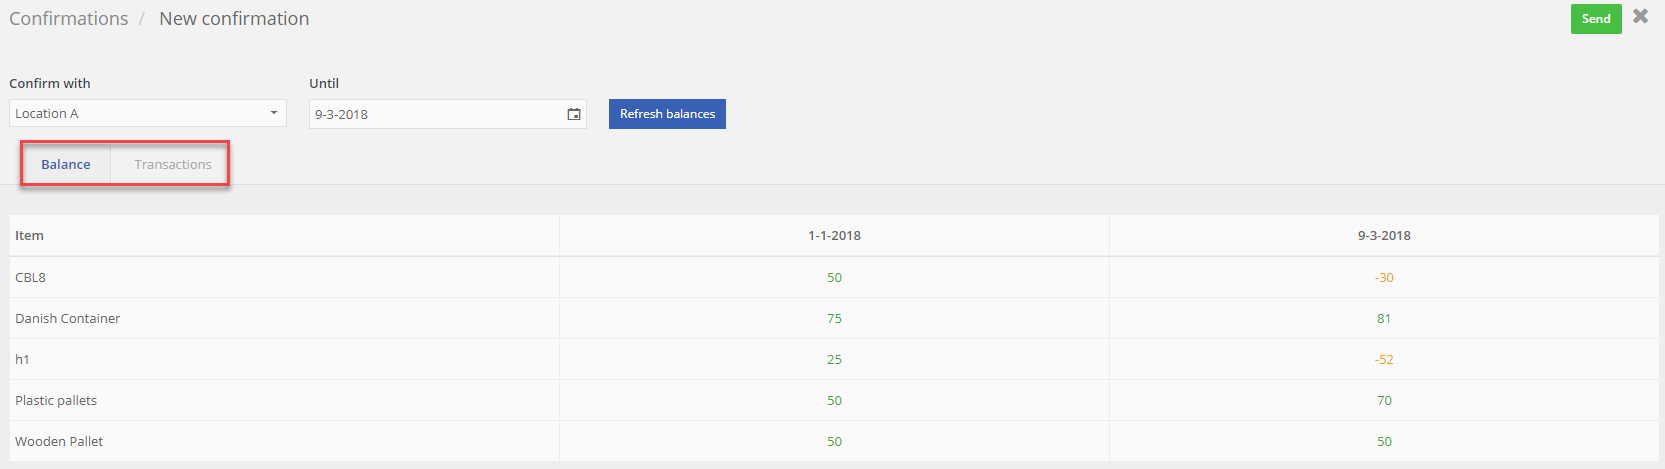
By clicking on the sub-header 'Balance', you can take a look at the balance of each item with the selected counterpart. Clicking on the sub-header 'Transactions' gives you information about all the different transactions of this balance.
If you are ready to send your confirmation to the counterpart, click on  at the right top of the screen.
You will see a balance confirmation preview as shown in the image below.
Balance confirmation preview
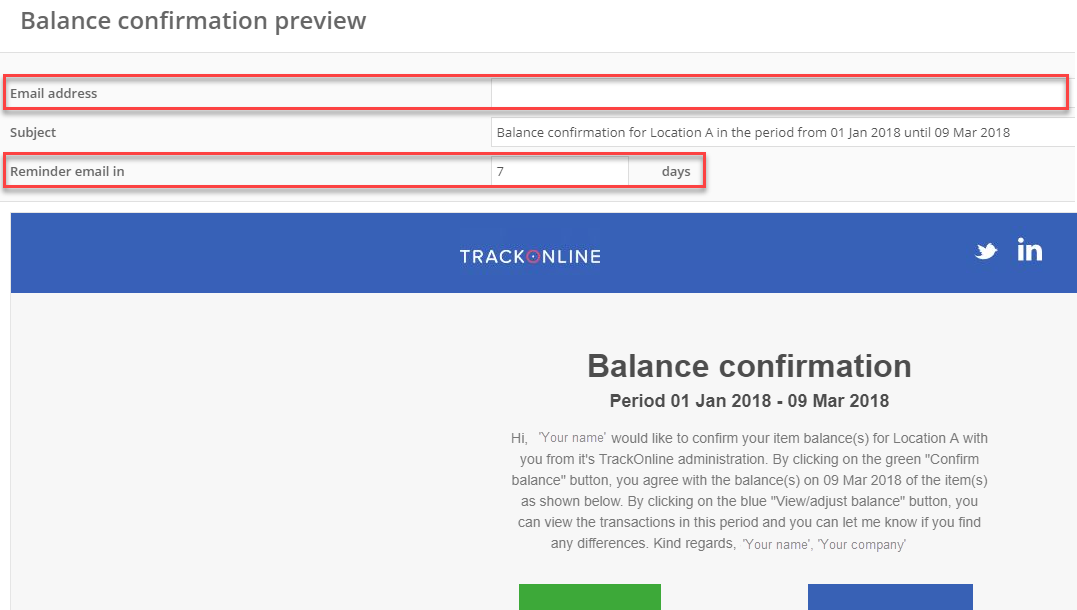
In the first input field, 'Email address', you will see the default email address for your counterpart when it is registered in TrackOnline. Otherwise, fill in the correct email address. In the same screen, you can also set a number of days that you want to for TrackOnline to automatically send a reminder to your counterpart, in case the counterpart does not respond. In the example it is set on 7 days.
If you are ready, click on the  button at the bottom right of the screen.
In the image below, you see the email exactly how the counterpart will see it.
Balance confirmation email
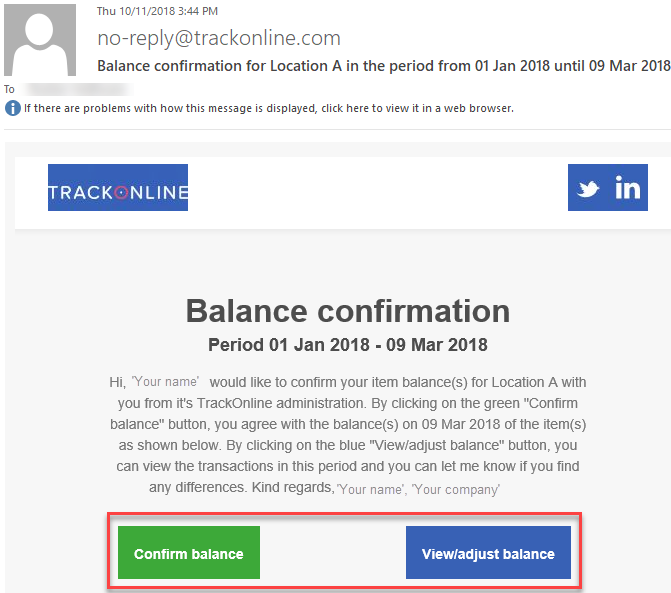
The counterpart that receives this email from you, has two options to choose from (see the red frame). Either confirm balance, or view/adjust balance.
When you scroll the email down, the counterpart can see the balance overview with the columns 'We owe you' and 'You owe us'. See the image below. These columns have to be read out of the perspective of the counterpart. So in this case the counterpart (the receiver of the email) owes 30 CBL8 and 52 h1 crates from you and has to send 81 Danish Containers to you.
Balance overview email

When the counterpart has read the email, he can choose one of the two options 'Confirm balance' or 'View/adjust balance'. Shown in the image 'Balance confirmation email' (above).
View/Adjust balance
Let's first take a look at the option 'View/adjust balance'. If the counterpart clicks on the blue button, they will see the following screen:
View/Adjust balance
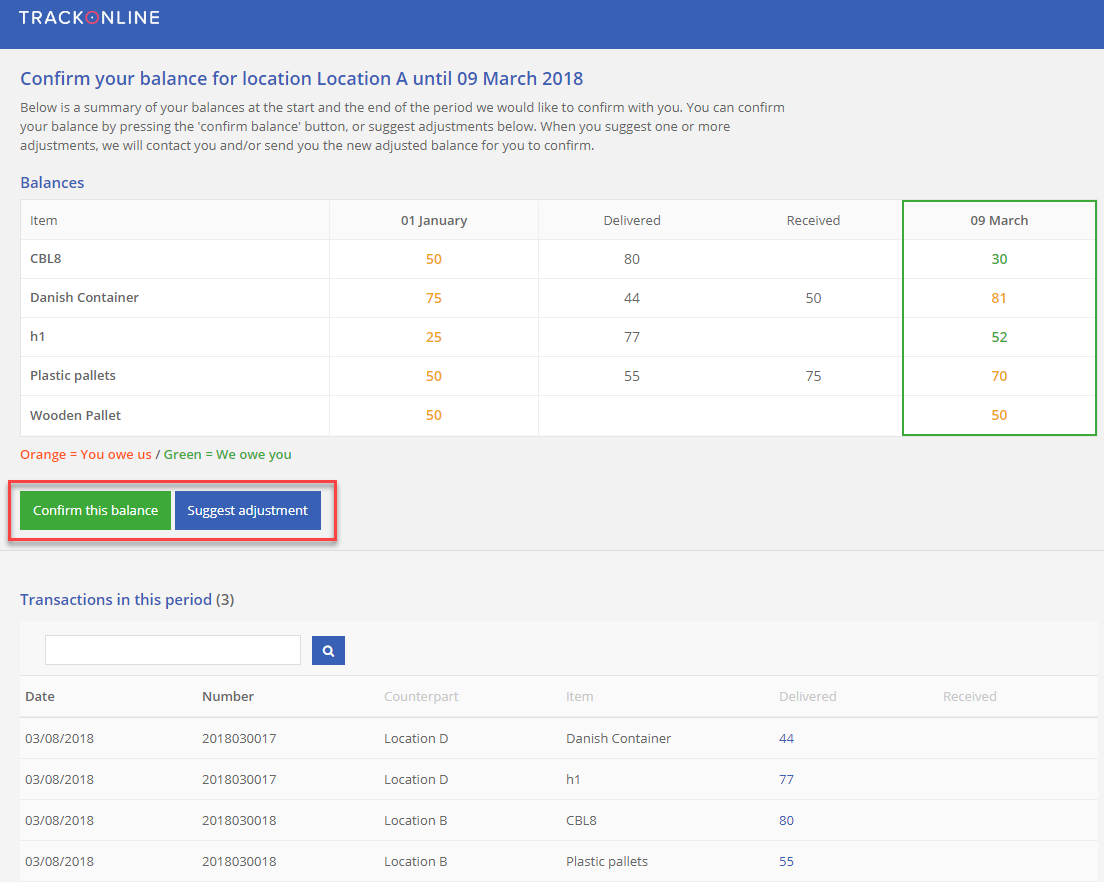
This screen shows a summary of the balances at the start and the end of a period. The orange numbers show item that the counterpart needs to return to you. The green numbers show items that they need to receive from you. At the bottom of the screen, you see the individual transactions between your two locations.
After looking at the details, the counterpart has the option to confirm. If the counterpart does not agree with the balance, they can suggest an adjustment by clicking on the blue button 'Suggest adjustment'.
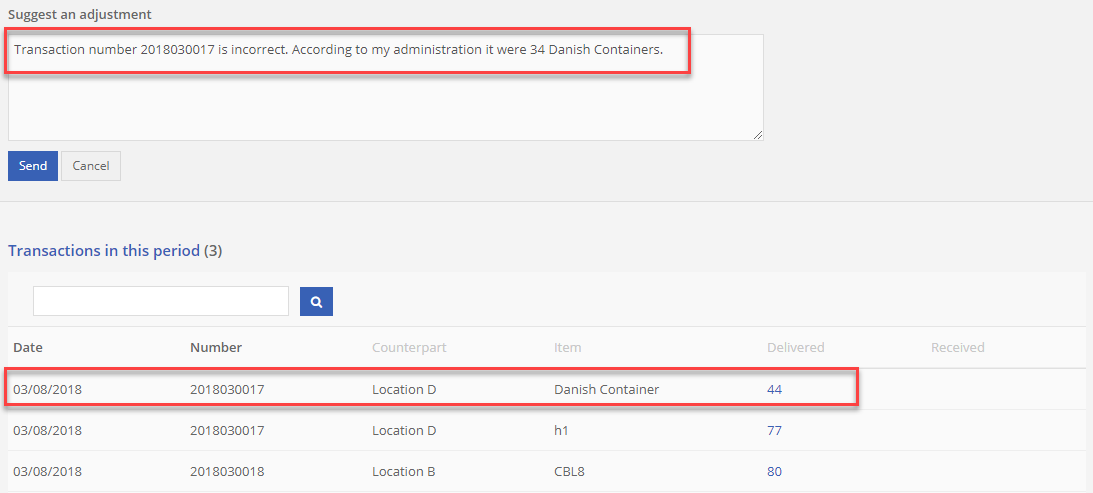
For example: In the image below the counterpart says it were 34 Danish Containers instead of 44.
Balance adjustment
By clicking on the  button, you will get informed with the new adjustment information.
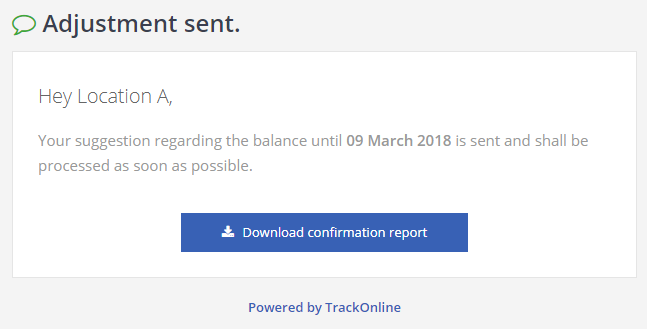
The counterpart gets a message, as shown in the image below, and is able to download a balance confirmation report in which his comments are noted.
Adjustment sent
You receive a notification in TrackOnline, as shown in the image 'Notification: Adjusted balance' below.
Notification: Adjusted balance
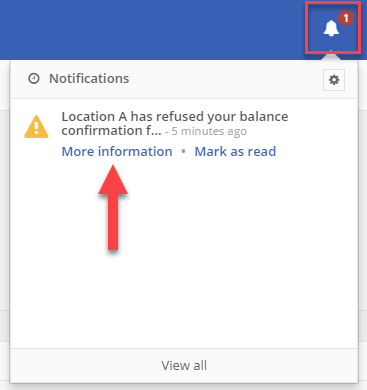
When you click on 'More information' you can see that, for this example, location A has refused the balance confirmation.
Warning: Refused balance confirmation

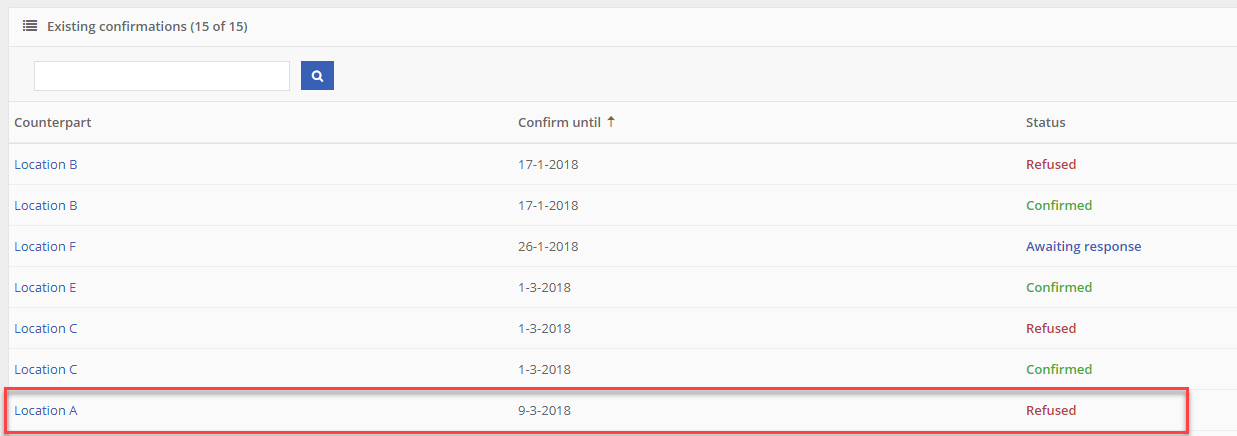
You can also see in the confirmation overview, that the status of the confirmation is changed to 'Refused'. See the image below.
Status change - refused
It is up to you to decide if you are going to act on this adjustment or not. For example by making a new transaction (see the topic 'Transactions').
Confirm balance
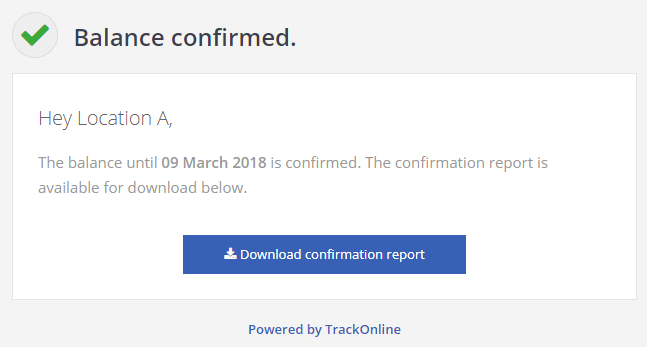
However, if the counterpart agrees with the balance confirmation, they can click on the green button 'Confirm balance' in the email as shown earlier in image 'Balance confirmation email'. They will see the following message:
Balance confirmed
In this case you also receive a notification in TrackOnline. This time the notification shows that the balance confirmation is accepted. See the images below..
Notification: Balance accepted
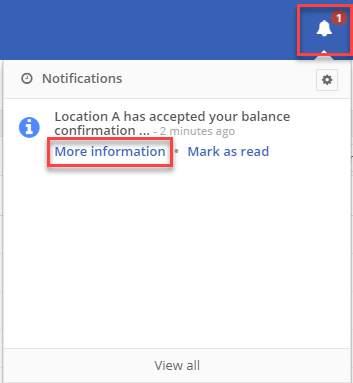
Message: Balance confirmation accepted

You can also see in the confirmation overview, that the status of the confirmation is changed to 'Confirmed'. See the image below.
Status change - confirmed
