Scenarios
How does it work when a carrier picks up a shipment and returns items right away?
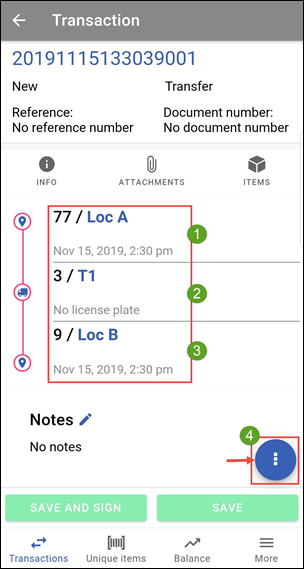
In this example the following transaction is waiting in the transaction overview:
- The From location, in this case Loc A (Location A)
- The Carrier, in this case T1 (Carrier 1)
- The To location, in this case Loc B (Location B)
- The action button, from here you can press the Carryover button to create a return transaction right away.

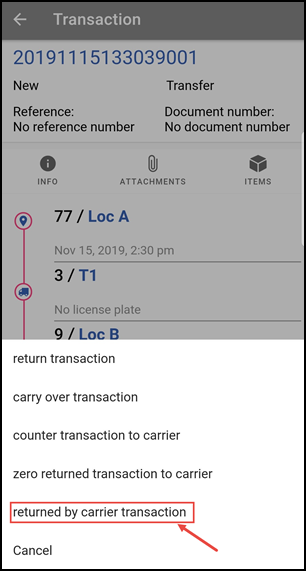
Here choose the carryover button as marked with the red arrow in the picture below.

After you pressed on the carryover button, you will see the screen from the picture below. Here choose for the option called returned by carrier transaction.

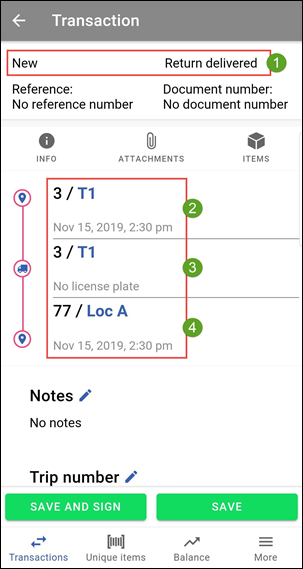
You will see the following information:
- The transaction type, in this case: Return delivered.
- The From location, in this case T1 (Carrier 1). The Carrier, in this case (also) T1 (Carrier 1). The To location, in this case Loc A (Location A).
- Notes (if there are any) that are important to this transaction.
Scroll down to see the other details of this transaction.

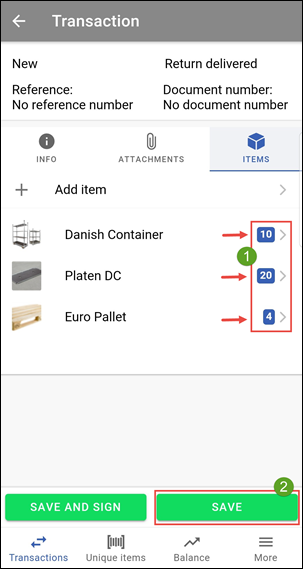
After the INFO screen has been filled as desired you still need to enter the amounts that are being returned, to do this you need to go to the ITEMS screen.
- Enter the amounts that will be returned by the carrier here.
- Press SAVE to confirm the transaction or press SAVE AND SIGN to save and sign the transaction.

