Import tool
Introduction
If you would like to import files in TrackOnline form an external system, you can use the TrackOnline Import Tool. In this chapter we explain how to install the tool and how to use it.
Installation guide
Step 1:
Download the tool from the following url: https://trackonlinefiles.z6.web.core.windows.net/updates/ImportTool.1.0.0.0.zip
Step 2: Unblock the file
To unblock the file, you have to right click on the file and select properties. If there is a button unblock, you should press it. If no button is there then it is not blocked.

Step 3: Unzip
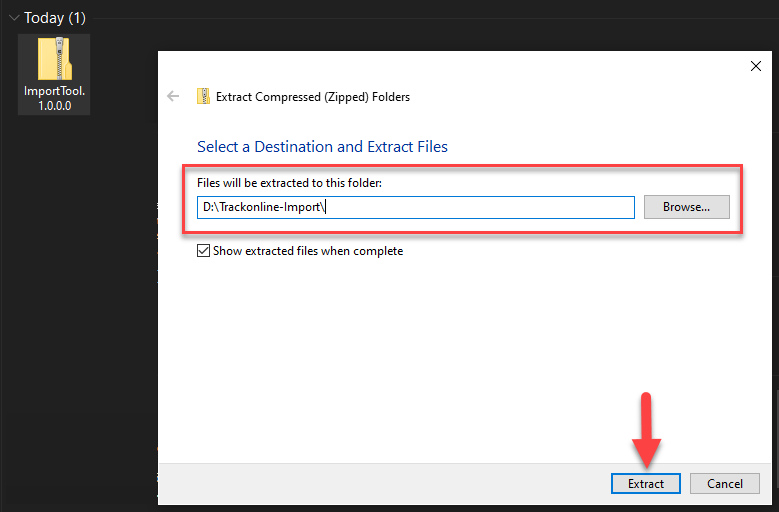
You should extract the zip file to a folder where the program will be used.
Eg: D:\Trackonline-Import\
In Windows you can right click on the file and select the option 'extract-all' and then select a folder where you want the files to be saved.
Step 4: Install .net core 3.1
If you already have .net core 3.1 installed, you can skip this step.
Otherwise click on the following link to install .net core 3.1: https://dotnet.microsoft.com/download/dotnet-core/thank-you/runtime-3.1.0-windows-x64-installer
Step 5: Configuration
In the folder with extracted files is a batch file 'startimport.bat'. This file will be used to start the import process.
First you need to edit this file. Therefor, click with the right mouse button on the file and click 'edit'.

The file contains the text below.
@echo off
Import.exe  -p D:\Import -f *.xlsx -k yourApiKey
Pause
Note:
For unattended use, the pause command should be removed. (but for testing it is easy, because you see the output when you doubleclick on the startimport.bat).
You need to edit the file with your own information.
The required options are:
The apikey (-k) you get by logging into your TrackOnline administration and create or copy an apikey under administration settings. See also Apikey Documentation.
The path (-p) should be the location where the importfiles are written. The excel files have a fixed format. Here you can download the template excel file: https://trackonline.blob.core.windows.net/public/TransactionsImport.xlsx
Below you find all the parameters for the import command:
Import:
Uploads xml or excel file(s) to TrackOnline Api and starts the import.

Usage:
Import [options]

Options:
-k, --apikey, --key <apikey>               The api key for TrackOnline. (required)
-p, --path <path>                          The folder where the importfiles are. (required)
-f, --files <files>                        The filemask of the files to import eg *.xlsx or *.xml. Default=*.xlsx
-d, --done <done>                          A folder where to put the files that are done. Default =done
-u, --url <url>                            The url of the external api. Default=https://api.TrackOnline.com
-s, --external-source <external-source>    The external source to use for import. Default=external
-t, --time-zone <time-zone>                The timezone to use for date import. Default=W. Europe Standard Time
--version                                  Show version information
-?, -h, --help                             Show help and usage information
Set the correct parameters and save the file.
An example of how a basic file could look like: 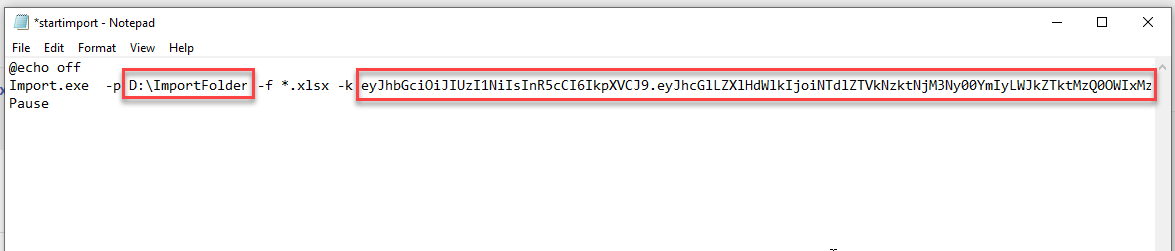
Note:
If you would like to import to the acceptation environment you need to add a different external api url. Below you see an example how this would look like: 
Step 6: Test
Now you are ready to test. Place an example excel file with only one transaction in it in the import folder. Then run the startimport.bat
You should see a message like this:
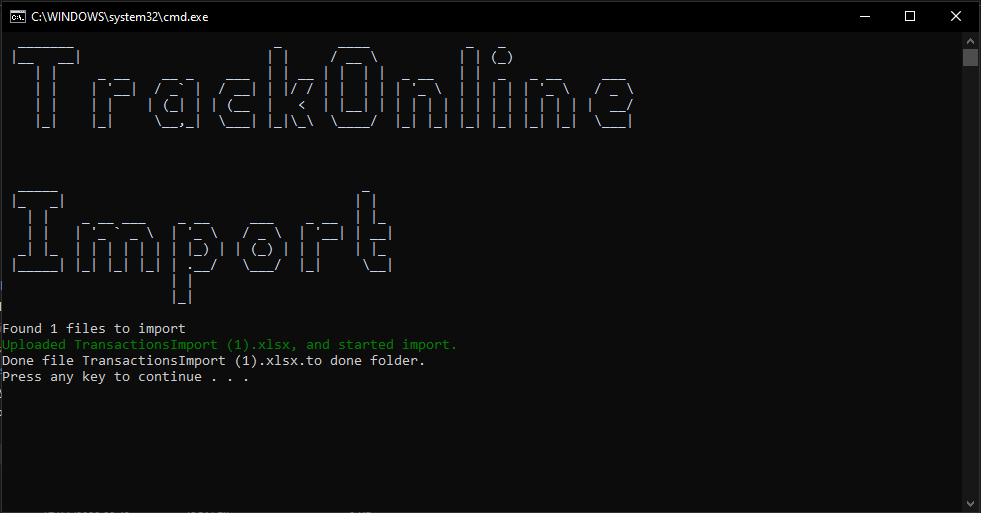
Other things you could see is 401 unauthorized. Then the apikey is not valid or you did not copy it correct to the batch file.
Step 7: Automate import
The import tool now works only if you manually click on the batch file. However, you can automate the import functionality. For instance, if you would like to scedule an automated import every 30 minutes.
Therefore click on the link below and folow the intructions.
https://www.windowscentral.com/how-create-automated-task-using-task-scheduler-windows-10